• About
  • First time here?
  • Sitemap
  • Archives
  • Categories
  • Posts Tagged ‘progress pictures’

    Where the Magic Happens


    2016 - 07.31

    There’s been a few awesome milestones lately in my world of recording.  Let’s rattle em off:

    Electra MAXXED1. I’ve got “www.YouTube.com/ElectricTrumpet”!

    My YouTube channel now has enough subscribers that I could acquire a custom URL.  Now all of my Electric Trumpet exploits can now be seen at the easy-to-remember address of www.YouTube.com/ElectricTrumpet which is pretty nifty indeed (although the embedded link here takes you right to the full videos page).  I have continued to upload more content there and there shall be a steady stream to come as well so check it out both now and later.

    2. The size of my musical exploits is now crossing one Terrabyte in size!!

    As you can see by the hard drive properties in the screenshot at left, my recording hard drive is soon to be full.  The only thing on this hard drive is audio recordings I have made!  There is maybe a small bit of filler in there in terms of mp3s of songs I need to practice or other bloat like zip files of sessions to be uploaded and shared but it’s mostly jams, wavs, and things happenin.  It feels so great to see this.  It’s one thing to stack up a big pile of gear and spend a bunch of cash on the tools of the trade, but it feels a lot better to see the proof in the pudding so to speak, the walking of the walk in actually creating stuff.  There’s a ton of people out there who spend boatloads of money on expensive hardware, be it photography or music or whatever, but I always find myself internally asking the question, “Yeah, but what have you MADE?”  Here I am, earning the right to talk that trash.  Hell yeah.

    3. The input capacity of my setup has expanded to THIRTY!!!

    I’m pretty psyched up about the fact that I’ve now acquired enough gear to extend my recording setup from 16 channels up to 30!  I’m adding a sweet “The Moment Of Genesis” tag to this post for this milestone.  On the face of it, it seems like 16 channels should be plenty, right?  But as time has gone on I have expanded and expanded my methods of recording, and we’re now at the point that I’ve used the max of 16 channels for many consecutive sessions now, wishing that I had the capability to go higher.  If that seems unlikely, let me rattle them off: 1.overhead high-hat 2. overhead ride 3. snare 4. kick 5. electric bass 6. electric guitar 7. Leslie organ horn left 8. Leslie organ horn right 9. trumpet stand mic 10. Leslie bottom (15″) 11. trumpet pedalboard left 12. trumpet pedalboard right 13. trumpet clip-on mic (blended with stand for tone) 14. lower snare mic 15. room mic left 16. room mic right…  And there’s 16!  First thing I’m going to add over that will be 3 tom mics so that I can high pass the overheads, cutting the bass and the snare out of my overhead track without killing the life of the toms.  I have also been dreaming of adding an auxiliary percussion/conguero now and then, or having the ability to add other horn players, or a doubling of guitar or keys maybe.  So this unlocks all that capability although the main thing immediately is the addition of tom mics which I hope will clean up the low and high end overall.  Behold the glorious rack which will bring all that to life:

    recording rack setup 8/16

    Major Trackwork: Complete.


    2015 - 07.28

    IMG_9316 BLOGSIZE

    IMG_9319 BLOGSIZEOver the long 4th of July weekend I took the two afternoons of free-time needed to do something I’ve been procrastinating on for a long time now: complete the short stretch of track needed to join the upper and lower decks of my railroad! This required the installation of three switches, five transitions from code 83 to 100, three rerailers and assorted wiring/soldering. So it was somewhat of a busy little stretch in terms of trackwork and attention needed for the actual construction even though it is not very long in size.
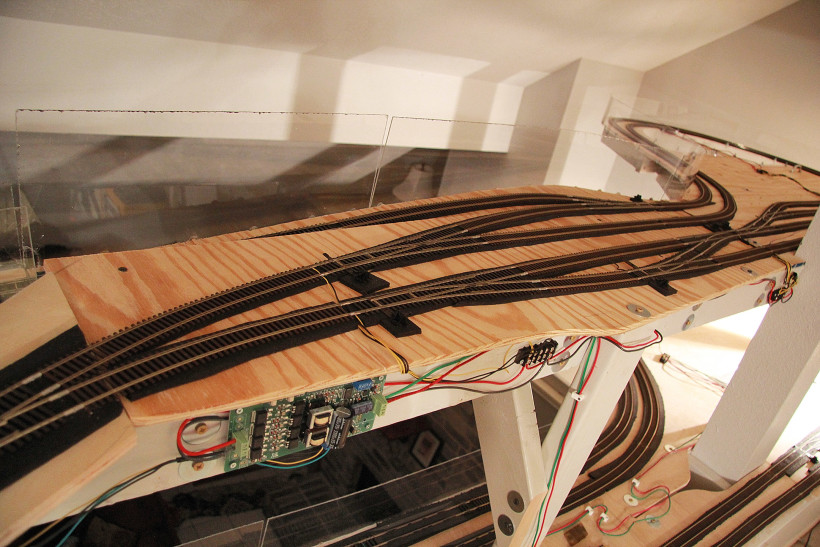
    As part of this construction project, I also completed what I’ve been calling my level 1.5 staging tracks. These are three very long, single-ended staging tracks that can accommodate a huge train, like a 12 car North Coast Limited. Since the passenger cars and engines that compose a big train like that will draw a lot of current from my DCC system, I also installed a light switch under the layout that can switch power to that section of track on or off.

    My layout wiring has been largely improvised with little to no foresight or planning which has resulted in an increasingly gory spectacle of wire madness for those brave enough to venture beneath the layout. There’s one particularly bad spot where several levels of track wiring all join together, combined with an autoreverser and a circuit breaker. It’s pretty much disgusting but that’s what I get for a lack of wiring planning.

    When I designed my layout I knew that if I had an upper level and a lower level there were only 2 choices of how to join them: a helix or a long steep grade. I’ve never been a fan of the helix since they take up a huge amount of space and can’t be included into the layout as anything remotely realistic. So a steep grade it is. It turned out mostly around 3% although it does approach just under 5% at the steepest point, which is somewhat beastly of a slope.

    In real life when trains encountered an unavoidable mountainous grade, the train crew would split the train in two and take it up the hill in smaller pieces in a move called “doubling the hill”. So this same behavior is required on my layout since the engines won’t be able to pull a huge train up this grade. After performing this maneuver a few times over the weekend, I think I actually enjoy this operational requirement. It adds a bit of challenge and reward for sending trains up and down. This forces some “operation” on the layout rather than running loops, which is still the main thing I enjoy.

    Pacifc Coast Extension: Progress Pics Pt.4


    2015 - 02.18

    Time for an update on the Pacific Coast Extension model railroad progress! When last we left off, I had just completed the upper deck benchwork and subroadbed (i.e. flat plywood) over the staging. As you can see in the photos, I’ve now completed the entire upper deck benchwork and subroadbed, which, like many things in this hobby, is a simple sentence to say but a huge amount of work to actually do.

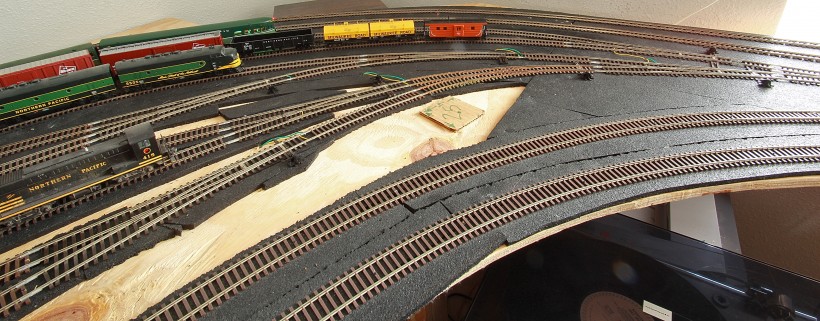
    I’ve also completed the inclined subroadbed which leads from the lower deck to the upper, although all the track is not yet in place there. A small section remains where three tracks of singled ended staging branch off. I added this area since I do enjoy running very long trains–long enough that some of them need to be broken up to fit in the double ended staging below. The wiring is installed for all new track mentioned in here as well. I did miss my self-imposed deadline of completing all mainline trackwork by the end of 2014 although since I only missed it by a couple weeks, I’m going to call that a win. Such deadlines are created to motivate oneself, and in that regard it was a success.

    the mountain loop (furthest "right" in these images)

    An autoreverser has been installed on the newly-completed mountain loop (shown above), although I’ve been struggling to get it to work correctly with the snap-coil switch motors which will allow a train to automatically run endless loops on the upper deck. Right now I’m thinking something just isn’t wired correctly and I need to spend the time to figure that out.

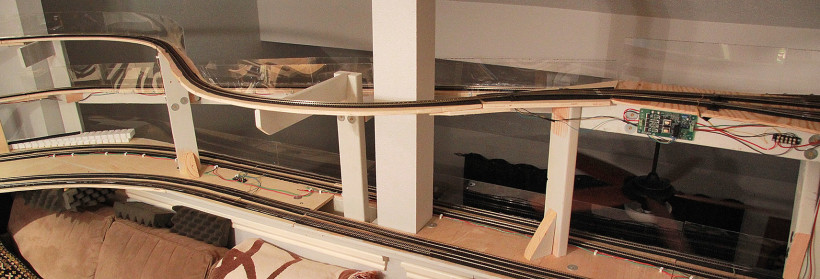
    The incline between decks never exceeded 4.5% as measured with my Micro Mark precision level, an invaluable tool. However it does appear quite steep visually and I know certain trains are definitely going to require helpers or multiple trips to make it up the grade between levels. That’s alright though, I’m okay with that. Real life worked the same way. Now if only MTH would hurry up and make some Boxcab motors.  Shown below is the large curve which will eventually be built into the Mine Creek trestle, and the incline between decks.  The plexiglass is there because that ledge is open to the living room, probably like 20 feet below!  This photo is looking just to the right of the one above.

    Mine Creek and deck connection

    To continue looking to the left of the photo above, here is another view, showing how the laypout wraps around the desk with a window behind it:

    IMG_7131 v2

    Speaking of the trains themselves, there are a few great new additions to the railroad. Foremost of these would be a Milwaukee Road creek series observation car, something available only in brass although fortunately it has been produced several times by different makers in the last several decades. I believe mine comes from the 1980s although I’m not sure. It has already been sent off for a custom paint job to match the Walthers cars, and I intended to further customize it by building an interior and adding lighting.

    Another beaut I’m delighted to have around is an MTH Little Joe in the orange and black freight scheme. Although my railroad is set in Washington state, there is a large amount of scenic overlap between Milwaukee’s Coast Division where the Bipolars ruled, and their Rocky Mountain division where the Joes ruled electric operations. That’s as far as I intend to ‘bend the rules’ at least at this point. Besides, any self-resepecting Milwaukee electrics modeler has got to have a Joe or three around; they’re debatably the most iconic of all Milwaukee Electrics, lasting from the 50s right up to the end.  You can see E73 in the picture below, which shows the staging area:

    IMG_7151 v2

    A few interesting things I’ve learned: Micro Engineering flextrack is great, especially if you use Peco track fixing pins along the edges of the ties, as opposed to large Atlas spikes on the center of the ties. This hides the spikes quite well and makes the track look more realistic. However it does hide the spikes so well you may accidentally do some damage trying to reposition the track later, by overlooking that hidden extra spike you put on the far side of the rail which is nearly impossible to see. ME flextrack also has a very annoying way of shortening the far end when bent even slightly–always check BOTH ends of the track before you cut any rail. And I do mean always.

    I’ve also ordered the supplies to commence with rock building on a large scale, which is a stage of construction I’ve LONG been itching to reach. I will have more details on that stage later this year.

    Pacifc Coast Extension: Progress Pics Pt.3


    2014 - 08.23

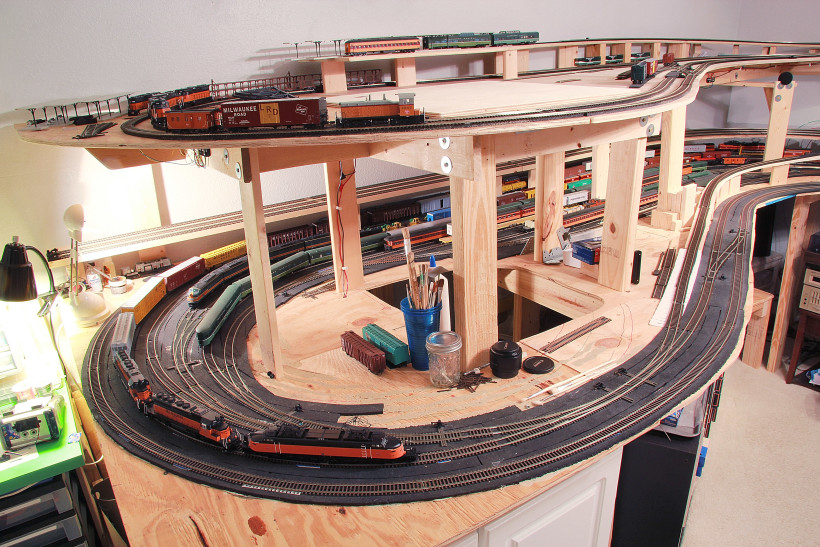
    So onward and literally upward with the Pacific Coast Extension model railroad project.  I’ve begun work on the upper level which will have two very large steel viaducts, a model of Union Station in Seattle with long platforms, some kind of industry switching (although I have not decided exactly what yet), and oodles of cool mountain scenery.  That’s what I see when I look at it.  For now it’s all plywood sheet and pine boards.  My benchwork is improvised as I go along rather than pre-planned, which results in some interesting choices, as you can see below.  I don’t mind the added challenge though, since it helps me improve my woodworking skills.  I thought I ought to take some shots of the layout before the upper layer is mounted, because once that happens it’s probably never coming off again.  Here is a view which  is taken from the same perspective as the image in the previous post, which shows the upper layer benchwork that’s new.  Also visible is a wide variety of trains… notably the SD40-2 #156 with the red white n blue Bicentennial paint scheme right in the foreground.  Immediately behind him is a Broadway Limited SW2 which I’ve loaded up with an old Kato NW2 shell that’s actually superior to the brand new Broadway shell despite its age.  Behind that are two observation cars which both have lighted drumheads although–oops–the layout was off when I took this photo so they’re not lighted.  The Northern Pacific North Coast Limited is seen in green, alongside the Heavyweight Columbian observation car.

    IMG_5247 v2

    And here is a view from above:

    IMG_5256 v2

    Visible there is the ascending track which will slowly build in elevation until it unites with the upper level.  Lastly, the same view with the beginnings of the top layer added.  The piece that covers the access hatch from the lower level will be a hinged-section which will swing outward toward the camera, allowing top-level access to the track closest to the wall on top.  Since this photo was taken I have already changed the upper two tracks in the background which will be the station platform tracks, so what’s seen here is still subject to adjustment.  Although you can’t really tell it from these photos, the upper level is just below eye level for a six foot tall person, so the layout is actually quite tall.  These shots were actually taken holding the camera above my head to show everything.  The upper level is 20″ above the lower.

    IMG_5265 v2


    Pacifc Coast Extension: Progress Pics Pt.2


    2014 - 03.05

    So it’s been a while since I posted an update on my model railroading progress. I’ve been dabbling with a host of side projects but the two main accomplishments of the last few months have been 1. the organization of my workbench and 2. the completion of my staging area.

    RR workbenchIt can be hard to motivate yourself to put work into the space where you do your work, rather than devoting that time into actual projects themselves. But my overly-cluttered railroad workbench had reached an overpopulation of ridiculous proportions. I don’t have any “before” images to provide for contrast because taking a photo of how it used to be would be an embarassment. At Home Depot I found one of these 30-drawer organizers meant for screws and washers and that has worked out positively brilliant for the bulk of my small objects which need to be kept in sensible order. It’s been one of those upgrades to your work situation that makes you say to yourself “geez, why on earth didn’t I do this sooner?! I’ve been languishing in the dark ages and this thing only cost me $20!”

    The desk itself is fairly primitive; constructed of spare 2×4 segments left over from benchwork construction and half of a cheap ikea desk surface I sawed in half. There’s a power strip screwed into the base which provides juice to lamps and the soldering iron. Sitting on the tabletop is a stack of white paper which I use to keep greases/glues off the actual green desk surface and a spare piece of foam for setting down delicate engines while I work on them. It’s nothing impressive but it’s been functional. I guess the main takeaway here is that maaan, a little organization sure goes a long way to making life easier.

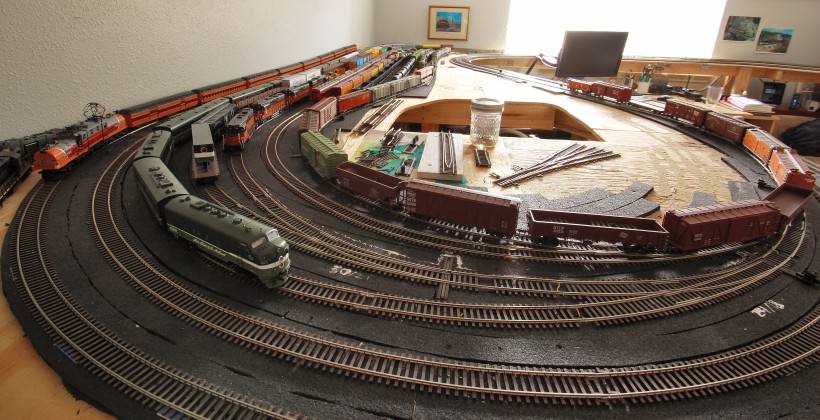
    The second, more exciting bit of progress I’ve made is to complete the staging yard–which is a short sentence to say but a lot of work to accomplish. Laying track is time consuming work when you want it to operate well. I added more work by deciding to have the whole yard hooked up to an autoreverser. It’s an “AR1” from Tony’s Train Exchange which monitors its (electrically isolated) track section thousands of times per second to see if there’s a short circuit compared to the main. If it detects one, it flips the polarity on its track to match, and does it so fast that the DCC system can’t detect that a short ever happened. It’s actually a pretty impressive little piece of technology if you stop and think about what it’s doing. The practical function here is to allow trains to enter the yard from either direction and never short anything, which allows me to turn long trains around. Very handy indeed! I chose the AR1 model specifically because it draws power from the track and therefore doesn’t need an independent power supply. It also has the capability to use the polarity flip to trigger a switch machine. So far I have zero switch machines on my layout but if I decide to add some in the future I could use that functionality.

    Staging Yard West End

    Speaking of switch machines, I installed a whole bunch of Caboose Industries ground throws and I learned something I wasn’t expecting; when using curved turnouts, you need to make sure that your passenger cars or autoracks don’t smash into the throw! If you position it even somewhat close to the track, it’s almost surely going to cause a problem. I ended up having my throws mounted all the way at the end of each switch throwbar. And it turned out that there was one curved turnout with a parallel curved track next to it which had zero possible placements where a throw wouldn’t cause crashes. I didn’t even think of this when I was coming up with the track plans! Fortunately my local hobby shop had a cheap mechanical solution which I could mount underneath the layout. It’s a Rix hand operated throw which doesn’t have any spring or tensioner in it so I’ll need to keep an eye on it if I use it repeatedly, but I think it ought to work well enough for that particular track.

    And speaking of underneath the layout, I was also surprised at the amount of work it took to add wire drops from each section of track and make sure everything was getting powered. Long stretches of flex track are pretty forgiving when it comes to conducting the signal but add in a bunch of switches and wow, all sorts of connection issues start appearing, even though I was using brand new, snug rail joiners. I had to go back an add more connections once I thought I was done. Now that it’s all complete though, it sure is nice!! I can have several long trains all on the tracks at the same time and choose which ones I want to take out and run, which is the whole strength of DCC afterall. It’s a milestone to now have a yard that allows me to take greater advantage of this.

    Staging Yard East end