• About
  • First time here?
  • Sitemap
  • Archives
  • Categories
  • Posts Tagged ‘Pacific Coast Extension’

    Major Trackwork: Complete.


    2015 - 07.28

    IMG_9316 BLOGSIZE

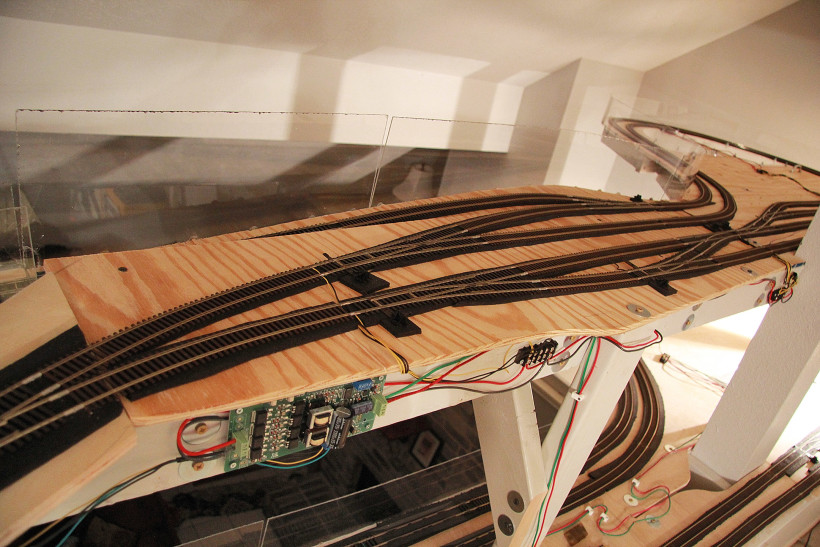
    IMG_9319 BLOGSIZEOver the long 4th of July weekend I took the two afternoons of free-time needed to do something I’ve been procrastinating on for a long time now: complete the short stretch of track needed to join the upper and lower decks of my railroad! This required the installation of three switches, five transitions from code 83 to 100, three rerailers and assorted wiring/soldering. So it was somewhat of a busy little stretch in terms of trackwork and attention needed for the actual construction even though it is not very long in size.

    As part of this construction project, I also completed what I’ve been calling my level 1.5 staging tracks. These are three very long, single-ended staging tracks that can accommodate a huge train, like a 12 car North Coast Limited. Since the passenger cars and engines that compose a big train like that will draw a lot of current from my DCC system, I also installed a light switch under the layout that can switch power to that section of track on or off.

    My layout wiring has been largely improvised with little to no foresight or planning which has resulted in an increasingly gory spectacle of wire madness for those brave enough to venture beneath the layout. There’s one particularly bad spot where several levels of track wiring all join together, combined with an autoreverser and a circuit breaker. It’s pretty much disgusting but that’s what I get for a lack of wiring planning.

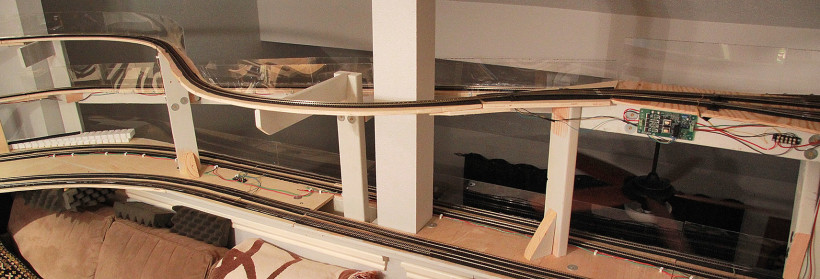
    When I designed my layout I knew that if I had an upper level and a lower level there were only 2 choices of how to join them: a helix or a long steep grade. I’ve never been a fan of the helix since they take up a huge amount of space and can’t be included into the layout as anything remotely realistic. So a steep grade it is. It turned out mostly around 3% although it does approach just under 5% at the steepest point, which is somewhat beastly of a slope.

    In real life when trains encountered an unavoidable mountainous grade, the train crew would split the train in two and take it up the hill in smaller pieces in a move called “doubling the hill”. So this same behavior is required on my layout since the engines won’t be able to pull a huge train up this grade. After performing this maneuver a few times over the weekend, I think I actually enjoy this operational requirement. It adds a bit of challenge and reward for sending trains up and down. This forces some “operation” on the layout rather than running loops, which is still the main thing I enjoy.

    Photographing the Milwaukee Road right-of-way in Washington state


    2015 - 07.12

    On June 17th 2015, a nearly cloudless day, I set out for a bike ride of the former Milwaukee Road railway between Easton and Cedar Falls in Washington state.  It is now the Iron Horse state park AKA the John Wayne trail.  This album shows the best of the many photos I took along the way, documenting the area for the purposes of reconstructing it via model railroading.  Hence there is a heavy emphasis on tunnels and bridges, rocks, and small details that may only be of interest to railroad fans.  There are also several large panoramas which you’ll need to download to view full size.  I may use these to build a photo backdrop.  There are 217 photos and I highly recommend viewing them on flickr if you want to enlarge anything.  There’s a slideshow below which gives a preview but here is the full link:

    https://www.flickr.com/photos/microcosmologist/sets/72157655363495878/

    Pacifc Coast Extension: Progress Pics Pt.4


    2015 - 02.18

    Time for an update on the Pacific Coast Extension model railroad progress! When last we left off, I had just completed the upper deck benchwork and subroadbed (i.e. flat plywood) over the staging. As you can see in the photos, I’ve now completed the entire upper deck benchwork and subroadbed, which, like many things in this hobby, is a simple sentence to say but a huge amount of work to actually do.

    I’ve also completed the inclined subroadbed which leads from the lower deck to the upper, although all the track is not yet in place there. A small section remains where three tracks of singled ended staging branch off. I added this area since I do enjoy running very long trains–long enough that some of them need to be broken up to fit in the double ended staging below. The wiring is installed for all new track mentioned in here as well. I did miss my self-imposed deadline of completing all mainline trackwork by the end of 2014 although since I only missed it by a couple weeks, I’m going to call that a win. Such deadlines are created to motivate oneself, and in that regard it was a success.

    the mountain loop (furthest "right" in these images)

    An autoreverser has been installed on the newly-completed mountain loop (shown above), although I’ve been struggling to get it to work correctly with the snap-coil switch motors which will allow a train to automatically run endless loops on the upper deck. Right now I’m thinking something just isn’t wired correctly and I need to spend the time to figure that out.

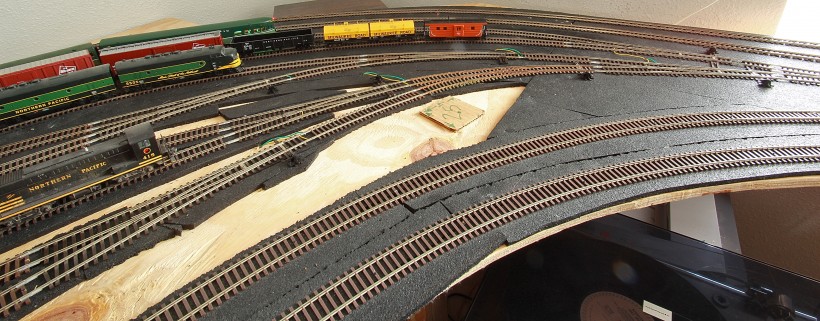
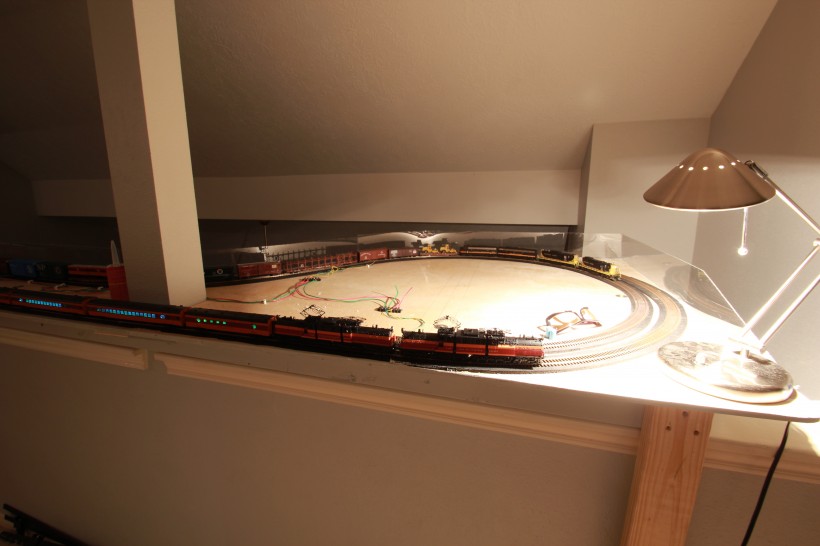
    The incline between decks never exceeded 4.5% as measured with my Micro Mark precision level, an invaluable tool. However it does appear quite steep visually and I know certain trains are definitely going to require helpers or multiple trips to make it up the grade between levels. That’s alright though, I’m okay with that. Real life worked the same way. Now if only MTH would hurry up and make some Boxcab motors.  Shown below is the large curve which will eventually be built into the Mine Creek trestle, and the incline between decks.  The plexiglass is there because that ledge is open to the living room, probably like 20 feet below!  This photo is looking just to the right of the one above.

    Mine Creek and deck connection

    To continue looking to the left of the photo above, here is another view, showing how the laypout wraps around the desk with a window behind it:

    IMG_7131 v2

    Speaking of the trains themselves, there are a few great new additions to the railroad. Foremost of these would be a Milwaukee Road creek series observation car, something available only in brass although fortunately it has been produced several times by different makers in the last several decades. I believe mine comes from the 1980s although I’m not sure. It has already been sent off for a custom paint job to match the Walthers cars, and I intended to further customize it by building an interior and adding lighting.

    Another beaut I’m delighted to have around is an MTH Little Joe in the orange and black freight scheme. Although my railroad is set in Washington state, there is a large amount of scenic overlap between Milwaukee’s Coast Division where the Bipolars ruled, and their Rocky Mountain division where the Joes ruled electric operations. That’s as far as I intend to ‘bend the rules’ at least at this point. Besides, any self-resepecting Milwaukee electrics modeler has got to have a Joe or three around; they’re debatably the most iconic of all Milwaukee Electrics, lasting from the 50s right up to the end.  You can see E73 in the picture below, which shows the staging area:

    IMG_7151 v2

    A few interesting things I’ve learned: Micro Engineering flextrack is great, especially if you use Peco track fixing pins along the edges of the ties, as opposed to large Atlas spikes on the center of the ties. This hides the spikes quite well and makes the track look more realistic. However it does hide the spikes so well you may accidentally do some damage trying to reposition the track later, by overlooking that hidden extra spike you put on the far side of the rail which is nearly impossible to see. ME flextrack also has a very annoying way of shortening the far end when bent even slightly–always check BOTH ends of the track before you cut any rail. And I do mean always.

    I’ve also ordered the supplies to commence with rock building on a large scale, which is a stage of construction I’ve LONG been itching to reach. I will have more details on that stage later this year.

    Pacifc Coast Extension: Progress Pics Pt.3


    2014 - 08.23

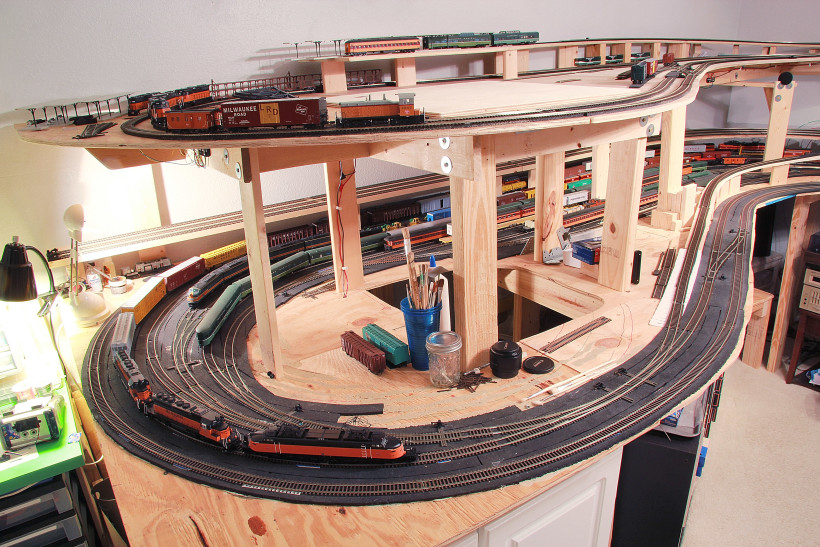
    So onward and literally upward with the Pacific Coast Extension model railroad project.  I’ve begun work on the upper level which will have two very large steel viaducts, a model of Union Station in Seattle with long platforms, some kind of industry switching (although I have not decided exactly what yet), and oodles of cool mountain scenery.  That’s what I see when I look at it.  For now it’s all plywood sheet and pine boards.  My benchwork is improvised as I go along rather than pre-planned, which results in some interesting choices, as you can see below.  I don’t mind the added challenge though, since it helps me improve my woodworking skills.  I thought I ought to take some shots of the layout before the upper layer is mounted, because once that happens it’s probably never coming off again.  Here is a view which  is taken from the same perspective as the image in the previous post, which shows the upper layer benchwork that’s new.  Also visible is a wide variety of trains… notably the SD40-2 #156 with the red white n blue Bicentennial paint scheme right in the foreground.  Immediately behind him is a Broadway Limited SW2 which I’ve loaded up with an old Kato NW2 shell that’s actually superior to the brand new Broadway shell despite its age.  Behind that are two observation cars which both have lighted drumheads although–oops–the layout was off when I took this photo so they’re not lighted.  The Northern Pacific North Coast Limited is seen in green, alongside the Heavyweight Columbian observation car.

    IMG_5247 v2

    And here is a view from above:

    IMG_5256 v2

    Visible there is the ascending track which will slowly build in elevation until it unites with the upper level.  Lastly, the same view with the beginnings of the top layer added.  The piece that covers the access hatch from the lower level will be a hinged-section which will swing outward toward the camera, allowing top-level access to the track closest to the wall on top.  Since this photo was taken I have already changed the upper two tracks in the background which will be the station platform tracks, so what’s seen here is still subject to adjustment.  Although you can’t really tell it from these photos, the upper level is just below eye level for a six foot tall person, so the layout is actually quite tall.  These shots were actually taken holding the camera above my head to show everything.  The upper level is 20″ above the lower.

    IMG_5265 v2


    Pacifc Coast Extension: Progress Pics Pt.2


    2014 - 03.05

    So it’s been a while since I posted an update on my model railroading progress. I’ve been dabbling with a host of side projects but the two main accomplishments of the last few months have been 1. the organization of my workbench and 2. the completion of my staging area.

    RR workbenchIt can be hard to motivate yourself to put work into the space where you do your work, rather than devoting that time into actual projects themselves. But my overly-cluttered railroad workbench had reached an overpopulation of ridiculous proportions. I don’t have any “before” images to provide for contrast because taking a photo of how it used to be would be an embarassment. At Home Depot I found one of these 30-drawer organizers meant for screws and washers and that has worked out positively brilliant for the bulk of my small objects which need to be kept in sensible order. It’s been one of those upgrades to your work situation that makes you say to yourself “geez, why on earth didn’t I do this sooner?! I’ve been languishing in the dark ages and this thing only cost me $20!”

    The desk itself is fairly primitive; constructed of spare 2×4 segments left over from benchwork construction and half of a cheap ikea desk surface I sawed in half. There’s a power strip screwed into the base which provides juice to lamps and the soldering iron. Sitting on the tabletop is a stack of white paper which I use to keep greases/glues off the actual green desk surface and a spare piece of foam for setting down delicate engines while I work on them. It’s nothing impressive but it’s been functional. I guess the main takeaway here is that maaan, a little organization sure goes a long way to making life easier.

    The second, more exciting bit of progress I’ve made is to complete the staging yard–which is a short sentence to say but a lot of work to accomplish. Laying track is time consuming work when you want it to operate well. I added more work by deciding to have the whole yard hooked up to an autoreverser. It’s an “AR1” from Tony’s Train Exchange which monitors its (electrically isolated) track section thousands of times per second to see if there’s a short circuit compared to the main. If it detects one, it flips the polarity on its track to match, and does it so fast that the DCC system can’t detect that a short ever happened. It’s actually a pretty impressive little piece of technology if you stop and think about what it’s doing. The practical function here is to allow trains to enter the yard from either direction and never short anything, which allows me to turn long trains around. Very handy indeed! I chose the AR1 model specifically because it draws power from the track and therefore doesn’t need an independent power supply. It also has the capability to use the polarity flip to trigger a switch machine. So far I have zero switch machines on my layout but if I decide to add some in the future I could use that functionality.

    Staging Yard West End

    Speaking of switch machines, I installed a whole bunch of Caboose Industries ground throws and I learned something I wasn’t expecting; when using curved turnouts, you need to make sure that your passenger cars or autoracks don’t smash into the throw! If you position it even somewhat close to the track, it’s almost surely going to cause a problem. I ended up having my throws mounted all the way at the end of each switch throwbar. And it turned out that there was one curved turnout with a parallel curved track next to it which had zero possible placements where a throw wouldn’t cause crashes. I didn’t even think of this when I was coming up with the track plans! Fortunately my local hobby shop had a cheap mechanical solution which I could mount underneath the layout. It’s a Rix hand operated throw which doesn’t have any spring or tensioner in it so I’ll need to keep an eye on it if I use it repeatedly, but I think it ought to work well enough for that particular track.

    And speaking of underneath the layout, I was also surprised at the amount of work it took to add wire drops from each section of track and make sure everything was getting powered. Long stretches of flex track are pretty forgiving when it comes to conducting the signal but add in a bunch of switches and wow, all sorts of connection issues start appearing, even though I was using brand new, snug rail joiners. I had to go back an add more connections once I thought I was done. Now that it’s all complete though, it sure is nice!! I can have several long trains all on the tracks at the same time and choose which ones I want to take out and run, which is the whole strength of DCC afterall. It’s a milestone to now have a yard that allows me to take greater advantage of this.

    Staging Yard East end

    Pacifc Coast Extension: Progress Pics


    2013 - 08.22

    I’ve been a busy man over the last months, planning for my wedding in a few weeks!  That’s going to be a lot of fun and I’m really looking forward to catching up with friends whom I don’t get to see like I’d wish.

    Over the last week I did get a chance to put some time into the model railroad and I thought I would post some progress pictures:

    Far East Loop

    Looking just left of the prior photo, onto the long straightaway

    The main section which will be staging and city, someday

    Shinohara #6 turnouts, cut for DCC

    And an action shot.  Working Rotary Beacons are awesome.

    Proud new member of the NCE DCC scene!


    2012 - 12.11

    DCC: That thing which turns your train layout from single player into multiplayer. I now have this technology, as well as two wireless throttles to control the action from anywhere! This is the best thing to happen to the trainset since…track. Very excited about this.

    Also, check out that awesome boxcar kit I built. For those so interested, it’s a Branchline Blueprint series model. Excellent details. Got four more like it to build up.

    But yeah. DCC. Wicked.

    Pacific Coast: Roadbed down, key players showing up


    2012 - 12.02

    Man. So much stuff has been happening on the model railroad lately that I’d be at risk of turning this site into nothing but a railroad blog if I posted it all individually. This also partially explains the plummeting number of posts on here. Writing for the site is fulfilling, but I will say it is energizing to work at a hobby where your efforts are rewarded with something physical. Railroading is fun!

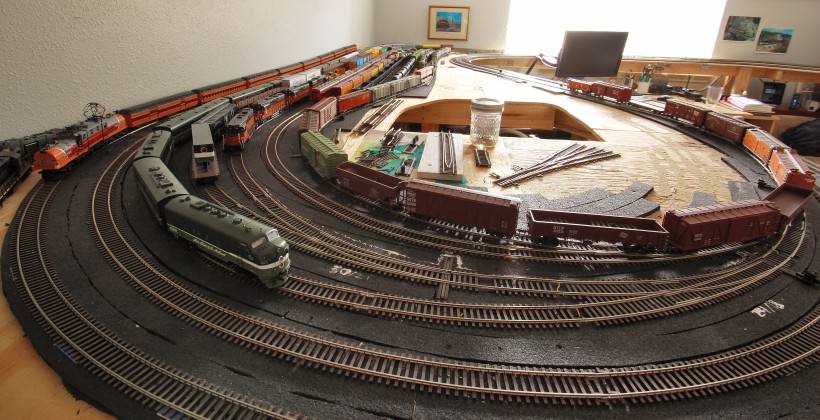
    The biggest undertaking since I last posted was removing *all track* from the layout (gasp!), putting down recycled 1/4″ rubber for sound-deadening roadbed, and then rebuilding not one but TWO loops around the whole layout. That one sentence was mammoth amount of work. I also reworked some of the benchwork in the process. This time I built the tracks a lot slower and was doggedly vigilant to get perfect connections between sections. It can’t be overstated how much that pays off, even if it’s excruciating to move slowly while you’re itching to run trains. You gotta fight that urge to rush it. In the construction photo here, you can see the new roadbed:
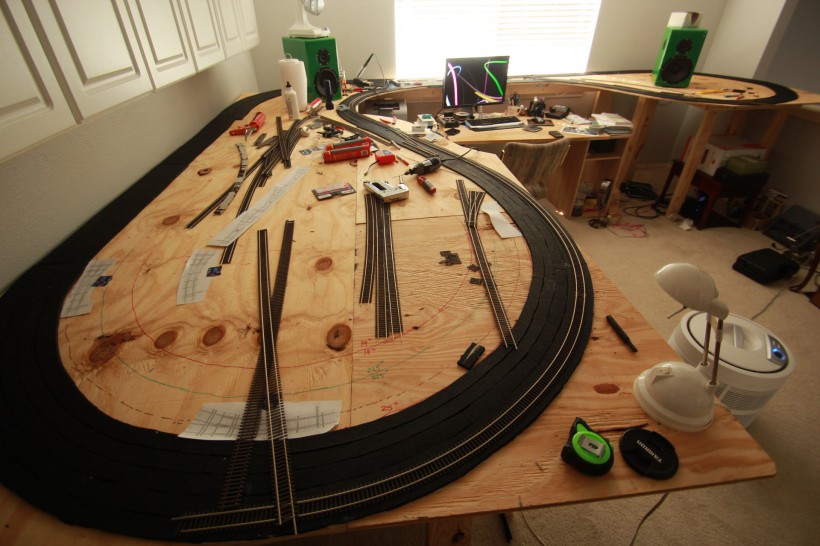
    That photo distorts the size of the staging end of the layout a bit as it was taken at 10mm.

    A few construction secrets I’ve figured out:
    The rubber roadbed is made of sections cut from a large 4x10ft roll I bought off Amazon. I figured out the best way to cut it is with a boxcutter moving away from your body. That way you push with the meat of your palm, instead of struggling to push down with your thumb and fingers which quickly gets fatiguing. Getting a deep cut on the first pass is essential to making the repetitive job of cutting the rubber go faster. Then you can easily peel the strip loose without fighting. You need to make <1″ wide strips to go around curves, because the rubber does not bend much. I found it’s also easiest to do this right on the layout, where the height is about elbow level. Doing it on the ground is tedious. I went with rubber because it’s cheaper than cork.

    My trackbuilding around all curves has been dramatically aided by using flex track “end ties”. These allow the ties to hold the rail separation constant right up until the end when building a curve. They’re not 100% perfect, but they do go a long way toward avoiding that dreaded slight “V” shape where your rails join up. In my experience, small V’s which are scarcely even visible can be an endless source of derailments and frustration. The end ties work out to about $0.33 each, which is completely worth it when you consider how much hair-pulling they’ll spare you later on. Another thing which is maybe common sense but still bears mentioning is the importance of checking the previous track connection before you finalize the one you’re working on. Flex track does slip around inside the ties and a small gap at the far end can easily appear when you’re not paying attention, causing extra noise, wheel wear, and maybe derailments later.

    With the new and improved mainlines I can now run my Hiawatha Super Domes without being plagued by constant derailments like I was before. Success! Time to bust out my notorious “Mister Super Fussy” flatcar and see how good I really did. The amount of derailments he produces is incredulous. Apocalyptic.

    In other news I broke-in my new Harbor Freight deluxe airbrush and so far it is working great. I got a tip from the dude at the hobby shop that you can thin Floquil paints with Xylene thinner (super cheap) so I’ve been doing that and it seems to be working well. Only advice there is wear nitrile gloves and keep extras handy; Xylene is some serious business. Spill it on your gloves and it will actually eat through them in maybe 10 minutes. Protip: pour some Xylene from the giant gallon jug into something like an old glass pasta sauce jar, then pour that into your airbrush paint jar to avoid spilling all over. Use it outdoors and stand upwind. I don’t even want to know what might happen to someone using this stuff in a confined space with poor ventilation. A 50/50 paint/xylene mix has worked well for an initial coat of Floquil Grimy Black onto my Micro Engineering steel viaduct parts. I’ve been airbrushing them while still on the sprues, with most of the flash already cleaned off. We’ll find out later if that was the right call or not…..

    But enough about the rails–onto the trains. Two big stars of the show have arrived:

    1.) the Milwaukee Road E-2 & E-3  Bi-polar Electrics in the 1955 black, orange, & maroon stripe paint scheme, as built by MTH
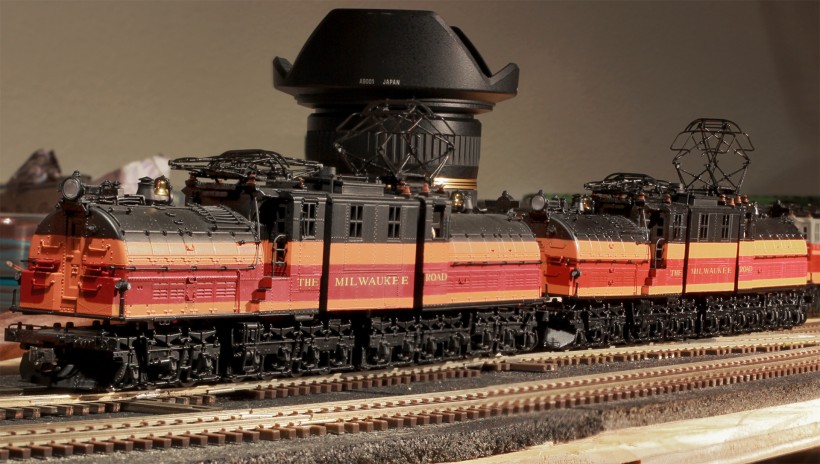
    Scored both of these on eBay in the last few months, and ended up paying the full retail value for one of them despite the fact that the eBay auction started quite low. That means street value isn’t budging, even 2 years after their release. Huh! One thing which may factor in here is the apparent desirability of this particular paint scheme. The ‘bay is completely flooded with MTH Bipolars wearing the “cat whisker” paint scheme, and those seem to be the least valuable scheme. When I bought my 2 units at release in 2010, I picked the E-1 in the experimental Olympian scheme and the E-4 in the 5-stripe cat whisker scheme, thinking that those two schemes would be the hardest to find later on down the line. Boy was I wrong about that!

    The simple maroon stripe scheme that my new E-2 is wearing has proven to be the most popular. Weird! Perhaps that can be explained by the era: the cat whiskers, while awesome looking, didn’t appear on the real thing for very long, and if you want to run the super domes (which of course you do), that means you need a paint scheme that is kosher for late ’52 and up: the maroon stripe. That, or UP yellow, which everyone knows is perverse and revolting.

    And their competition:
    2.) the Northern Pacific F9A/B North Coast Limited engines in the “Lowey” paint scheme, from Athearn’s Genesis series.

    I don’t even know how, but somehow I scored these models on eBay for the buy it now price of $60 for the set. And they said you can’t get a good deal on the ‘bay anymore! Pshaw.

    These are my first “Genesis” models and jeez, I now understand why people praise this line as the alpha wolf of plastic trains. The etched see-through grilles on the sides are impressive in person and the fans on the roof are an actual separate part beneath a fine screen; that detail is always super sweet. I’ve had Walthers Proto 2000 E6s for a long time and I always thought those were quite nice. These NP engines are a cut above that. Extremely nice. Although the Bipolars remain my ‘favorite’ engines, these units do capture the crown of ‘most detailed’ on the layout.

    The Genesis Lowey units run smooth and quiet. Only bad thing is that they’re strictly DC while the Bipolars are dual-mode DC or DCC. (fast explanation: in DC all trains go “the same” speed, and DCC is like “multiplayer” where different trains can be doing different speeds, or stopped, all on the same track) Either due to the gearing ratios or simply due to the MTH control setup, the Bipolars run WAY slower than the Genesis units at a given voltage. So the North Coast Limited is screaming around the layout while the Hiawatha leisurely moves through. This fact may push my timetable forward on acquiring a DCC setup, which has always been an inevitability for the future of this layout.  For now I just have two separate DC power packs.  The switch visible in the image of the roof of #6701A there is a fast-tracks #6 curved turnout, made by hand.

    I’ve also been slowly picking up minor pieces of rolling stock when I can find them for cheap. A stock car and a few boxcars. And a Proto 2000 GP-30 for cheap too! That was another lucky find, and he represents the nascent beginnings of a Thunderhawk consist. These are some badass, speedy diesels. I still need at least 2 more GP-30s and a Joe for the motive power… so a loooong way to go still. But this is the “moment of genesis” for the Thunderhawk, which is exciting.
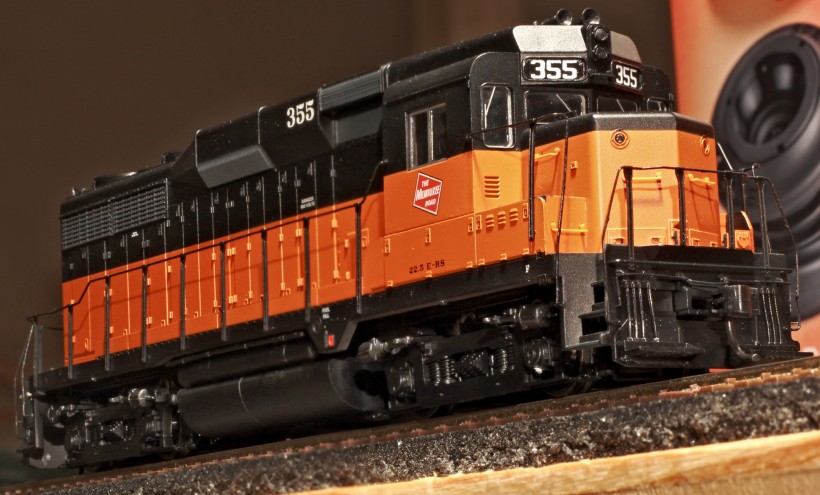
    One cool thing about this image (and the bipolar image too) is that they’re actually made of 2 separate photos with a different focus, spliced together in Photoshop.  I gotta do more of this composite focus thing, it makes for great shots…

    Pacific Coast Extension model railroading update


    2012 - 08.12

    So as I mentioned in my first posting, when I built my railroad, I immediately started to wonder if I hadn’t set the layout height too low. After about a week of watching the trains I decided that yeah, I underestimated where a good eye-level height should be. After cutting up a good amount of 2x4s, the new layout height is 39.5” above the floor, which is 9.5” above where it used to be. That might not sound like a big difference, but in person it has much better visual impact than it did before. I also reconfigured the benchwork on the far left side so that I can cut out a large circular area for access to the staging areas. That was a lot of work. Like a complex switch engine maneuver though, sometimes you have to go backward before you can go forward.

    That’s a perfect example of the disadvantages of planning as you go: things you just didn’t think about pop up and force you to backtrack. The upswing though is that my concept of the layout design is strengthened greatly by being able to SEE how each area looks and feels in the room. I’ve decided to remove the reversing loop on the far right side entirely, in favor of a longer one that will be partially underground on the yet-to-be-built section that will run along the ledge over the living room (this layout’s on the 2nd floor). Once that section goes in, the loop will get ripped out. Removing that loop will add a lot of extra elbow room for the computer desk and make the room feel more spacious. That is a consideration as well: I like the room to feel “open”, and cramming in too much railroad will ruin that sense of space.

    Another recent improvement is the addition of a curved section right in the center. This was more inevitability than sweet revelation, but this new piece will facilitate a larger staging area and better track flow at the “throat” of the yard. Next up I need to improve the benchwork at the center and start laying down rubber sound deadening to make the tracks permanent.

    There have also been two really sweet requisitions in the last few weeks: one, a set of Northern Pacific passenger cars which I’m really stoked about! They’re going to need some custom decals added to make them into a legit North Coast Limited train. I also plan to add the supplied handgrabs (maybe not ALL of them, as it’s tedious work) and airbrush just the sides with high-gloss finish to make them look like they’re freshly washed. I might try lightly weathering the trucks and underbody as well. One thing I noticed about these new cars is that they roll super-duper freely. I thought my Hiawatha cars were good, but man these things will move if you blow at them! This gross discrepancy in the coefficient of model railroading static friction has led me to realize… that the Hiawatha cars are in dire need of a truck cleaning! :O I think 99% isopropyl and a reapplication of Labelle’s #108 oil ought to do it.

    And the second thing, which is so fricking cool that it’s going to get its own post later, is…… the acquisition of a new Milwakee Road electric Bi-polar locomotive!! #E-2 in the maroon stripe scheme. After this one, all I’m missing from the MTH plastic production run (in any sort of desirable paint scheme at least) is the E-3. I’m quite excited to be adding this guy to the engine roster. He’s going to see a lot of action on the pike. All the hell aboard baby!

    But having an awesome railroad isn’t all about just buying up all the right trains.  It’s much more about making things.  Like building really awesome (and sometimes also hard) models!  If I want to run the Milwaukee Road’s “XL Special” freight, I’m going to need some tri-level auto racks to make her authentic.  Accurail makes a kit to build these things yourself and I just completed my first one this weekend.  I think it came out pretty good, although it still needs a Milwaukee badge yet.  Here it is, hanging out in the totally-empty staging area:

    Judge it against a photo of the real thing:

    Mine could use the railing along the top, and some of those cross-braces too.  Pretty decent as-is though.  I’m feeling happy.

    And–AND–this weekend I got into it with my new dual action airbrush from the cheap-tool wonderland that is Harbor Freight…  The Viaduct at Mine Creek now has paint.  Lookout people.  More on that to come….

    Taking Track Inventory


    2012 - 07.28

    Out of the many boxes filled with parts to unpack for my new model railroad, the one labeled “switches and track” was of particular importance. After unwrapping the goods from their protective newspaper bundling, I laid them all out on the fresh plywood where staging tracks are soon to be. It’s sort of strange to see my last layout condensed down into purely the specialized sections of track.

    Taking an inventory of what’s here (in descending order of exotic-ness)
    -one three-way turnout
    -one #6 curved left hand turnout
    -one #4 wye
    -one short section of custom bridge track
    -one #5 right hand turnout (peco)
    -two #5 left hand turnouts (peco)
    -three #6 left hand turnouts
    -nine #6 right hand turnouts
    -two rerailers (both in use)

    Time to figure out how to put it all to use! :D