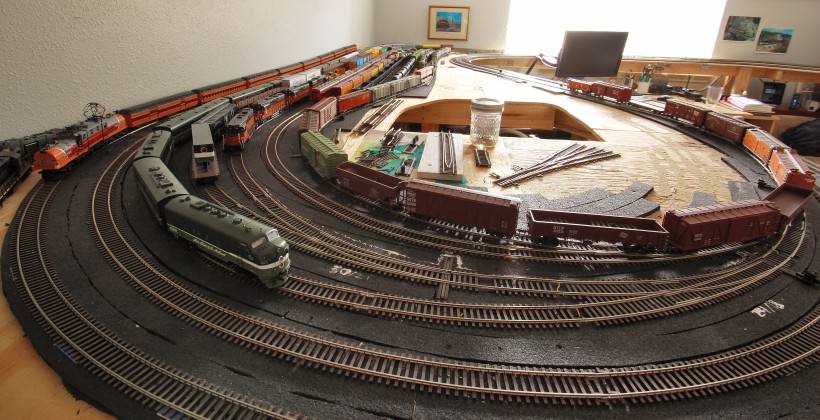
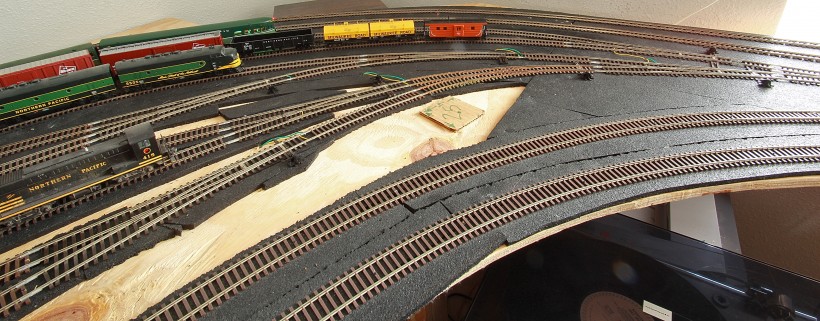
So it’s been a while since I posted an update on my model railroading progress. I’ve been dabbling with a host of side projects but the two main accomplishments of the last few months have been 1. the organization of my workbench and 2. the completion of my staging area.
 It can be hard to motivate yourself to put work into the space where you do your work, rather than devoting that time into actual projects themselves. But my overly-cluttered railroad workbench had reached an overpopulation of ridiculous proportions. I don’t have any “before” images to provide for contrast because taking a photo of how it used to be would be an embarassment. At Home Depot I found one of these 30-drawer organizers meant for screws and washers and that has worked out positively brilliant for the bulk of my small objects which need to be kept in sensible order. It’s been one of those upgrades to your work situation that makes you say to yourself “geez, why on earth didn’t I do this sooner?! I’ve been languishing in the dark ages and this thing only cost me $20!”
The desk itself is fairly primitive; constructed of spare 2×4 segments left over from benchwork construction and half of a cheap ikea desk surface I sawed in half. There’s a power strip screwed into the base which provides juice to lamps and the soldering iron. Sitting on the tabletop is a stack of white paper which I use to keep greases/glues off the actual green desk surface and a spare piece of foam for setting down delicate engines while I work on them. It’s nothing impressive but it’s been functional. I guess the main takeaway here is that maaan, a little organization sure goes a long way to making life easier.
The second, more exciting bit of progress I’ve made is to complete the staging yard–which is a short sentence to say but a lot of work to accomplish. Laying track is time consuming work when you want it to operate well. I added more work by deciding to have the whole yard hooked up to an autoreverser. It’s an “AR1” from Tony’s Train Exchange which monitors its (electrically isolated) track section thousands of times per second to see if there’s a short circuit compared to the main. If it detects one, it flips the polarity on its track to match, and does it so fast that the DCC system can’t detect that a short ever happened. It’s actually a pretty impressive little piece of technology if you stop and think about what it’s doing. The practical function here is to allow trains to enter the yard from either direction and never short anything, which allows me to turn long trains around. Very handy indeed! I chose the AR1 model specifically because it draws power from the track and therefore doesn’t need an independent power supply. It also has the capability to use the polarity flip to trigger a switch machine. So far I have zero switch machines on my layout but if I decide to add some in the future I could use that functionality.
Speaking of switch machines, I installed a whole bunch of Caboose Industries ground throws and I learned something I wasn’t expecting; when using curved turnouts, you need to make sure that your passenger cars or autoracks don’t smash into the throw! If you position it even somewhat close to the track, it’s almost surely going to cause a problem. I ended up having my throws mounted all the way at the end of each switch throwbar. And it turned out that there was one curved turnout with a parallel curved track next to it which had zero possible placements where a throw wouldn’t cause crashes. I didn’t even think of this when I was coming up with the track plans! Fortunately my local hobby shop had a cheap mechanical solution which I could mount underneath the layout. It’s a Rix hand operated throw which doesn’t have any spring or tensioner in it so I’ll need to keep an eye on it if I use it repeatedly, but I think it ought to work well enough for that particular track.
And speaking of underneath the layout, I was also surprised at the amount of work it took to add wire drops from each section of track and make sure everything was getting powered. Long stretches of flex track are pretty forgiving when it comes to conducting the signal but add in a bunch of switches and wow, all sorts of connection issues start appearing, even though I was using brand new, snug rail joiners. I had to go back an add more connections once I thought I was done. Now that it’s all complete though, it sure is nice!! I can have several long trains all on the tracks at the same time and choose which ones I want to take out and run, which is the whole strength of DCC afterall. It’s a milestone to now have a yard that allows me to take greater advantage of this.
Tags: Pacific Coast Extension, photography, progress pictures, trains


Looking good. Speaking of benches that’s something I need to clean up. I also need to get some decent light over the module now that its in the basement.