Man. So much stuff has been happening on the model railroad lately that I’d be at risk of turning this site into nothing but a railroad blog if I posted it all individually. This also partially explains the plummeting number of posts on here. Writing for the site is fulfilling, but I will say it is energizing to work at a hobby where your efforts are rewarded with something physical. Railroading is fun!
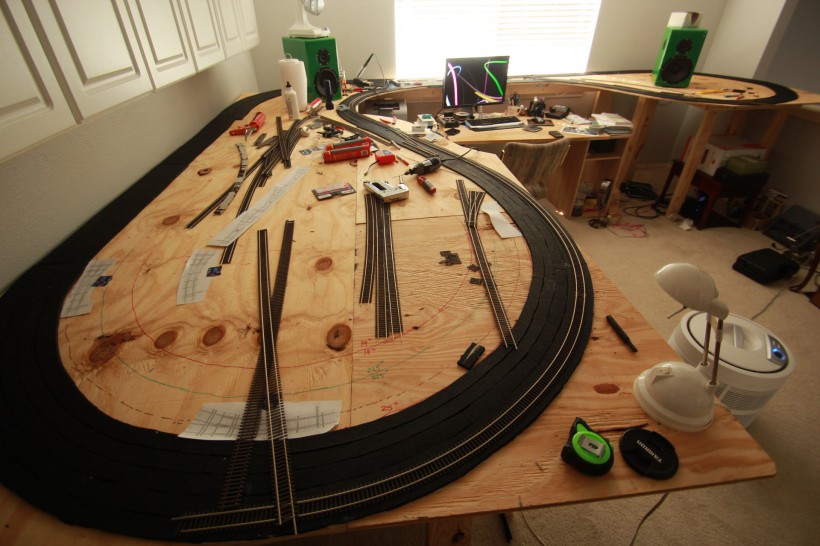
The biggest undertaking since I last posted was removing *all track* from the layout (gasp!), putting down recycled 1/4″ rubber for sound-deadening roadbed, and then rebuilding not one but TWO loops around the whole layout. That one sentence was mammoth amount of work. I also reworked some of the benchwork in the process. This time I built the tracks a lot slower and was doggedly vigilant to get perfect connections between sections. It can’t be overstated how much that pays off, even if it’s excruciating to move slowly while you’re itching to run trains. You gotta fight that urge to rush it. In the construction photo here, you can see the new roadbed:

That photo distorts the size of the staging end of the layout a bit as it was taken at 10mm.
A few construction secrets I’ve figured out:
The rubber roadbed is made of sections cut from a large 4x10ft roll I bought off Amazon. I figured out the best way to cut it is with a boxcutter moving away from your body. That way you push with the meat of your palm, instead of struggling to push down with your thumb and fingers which quickly gets fatiguing. Getting a deep cut on the first pass is essential to making the repetitive job of cutting the rubber go faster. Then you can easily peel the strip loose without fighting. You need to make <1″ wide strips to go around curves, because the rubber does not bend much. I found it’s also easiest to do this right on the layout, where the height is about elbow level. Doing it on the ground is tedious. I went with rubber because it’s cheaper than cork.
My trackbuilding around all curves has been dramatically aided by using flex track “end ties”. These allow the ties to hold the rail separation constant right up until the end when building a curve. They’re not 100% perfect, but they do go a long way toward avoiding that dreaded slight “V” shape where your rails join up. In my experience, small V’s which are scarcely even visible can be an endless source of derailments and frustration. The end ties work out to about $0.33 each, which is completely worth it when you consider how much hair-pulling they’ll spare you later on. Another thing which is maybe common sense but still bears mentioning is the importance of checking the previous track connection before you finalize the one you’re working on. Flex track does slip around inside the ties and a small gap at the far end can easily appear when you’re not paying attention, causing extra noise, wheel wear, and maybe derailments later.
With the new and improved mainlines I can now run my Hiawatha Super Domes without being plagued by constant derailments like I was before. Success! Time to bust out my notorious “Mister Super Fussy” flatcar and see how good I really did. The amount of derailments he produces is incredulous. Apocalyptic.
In other news I broke-in my new Harbor Freight deluxe airbrush and so far it is working great. I got a tip from the dude at the hobby shop that you can thin Floquil paints with Xylene thinner (super cheap) so I’ve been doing that and it seems to be working well. Only advice there is wear nitrile gloves and keep extras handy; Xylene is some serious business. Spill it on your gloves and it will actually eat through them in maybe 10 minutes. Protip: pour some Xylene from the giant gallon jug into something like an old glass pasta sauce jar, then pour that into your airbrush paint jar to avoid spilling all over. Use it outdoors and stand upwind. I don’t even want to know what might happen to someone using this stuff in a confined space with poor ventilation. A 50/50 paint/xylene mix has worked well for an initial coat of Floquil Grimy Black onto my Micro Engineering steel viaduct parts. I’ve been airbrushing them while still on the sprues, with most of the flash already cleaned off. We’ll find out later if that was the right call or not…..
But enough about the rails–onto the trains. Two big stars of the show have arrived:
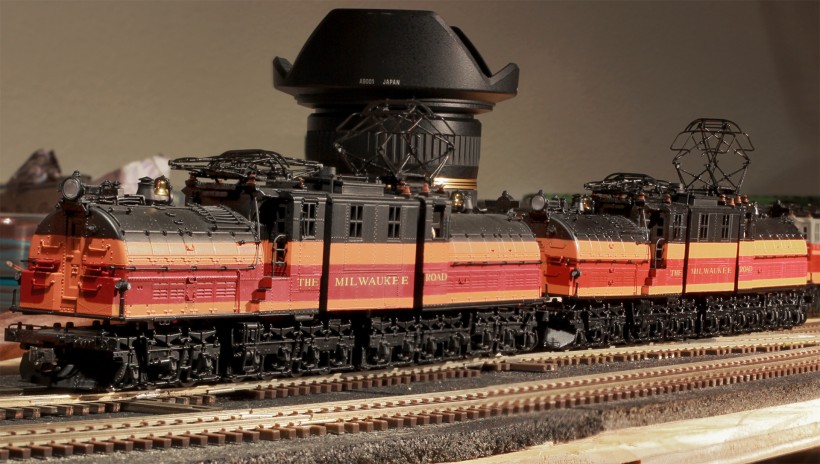
1.) the Milwaukee Road E-2 & E-3 Bi-polar Electrics in the 1955 black, orange, & maroon stripe paint scheme, as built by MTH

Scored both of these on eBay in the last few months, and ended up paying the full retail value for one of them despite the fact that the eBay auction started quite low. That means street value isn’t budging, even 2 years after their release. Huh! One thing which may factor in here is the apparent desirability of this particular paint scheme. The ‘bay is completely flooded with MTH Bipolars wearing the “cat whisker” paint scheme, and those seem to be the least valuable scheme. When I bought my 2 units at release in 2010, I picked the E-1 in the experimental Olympian scheme and the E-4 in the 5-stripe cat whisker scheme, thinking that those two schemes would be the hardest to find later on down the line. Boy was I wrong about that!
The simple maroon stripe scheme that my new E-2 is wearing has proven to be the most popular. Weird! Perhaps that can be explained by the era: the cat whiskers, while awesome looking, didn’t appear on the real thing for very long, and if you want to run the super domes (which of course you do), that means you need a paint scheme that is kosher for late ’52 and up: the maroon stripe. That, or UP yellow, which everyone knows is perverse and revolting.
And their competition:
2.) the Northern Pacific F9A/B North Coast Limited engines in the “Lowey” paint scheme, from Athearn’s Genesis series.

 I don’t even know how, but somehow I scored these models on eBay for the buy it now price of $60 for the set. And they said you can’t get a good deal on the ‘bay anymore! Pshaw.
These are my first “Genesis” models and jeez, I now understand why people praise this line as the alpha wolf of plastic trains. The etched see-through grilles on the sides are impressive in person and the fans on the roof are an actual separate part beneath a fine screen; that detail is always super sweet. I’ve had Walthers Proto 2000 E6s for a long time and I always thought those were quite nice. These NP engines are a cut above that. Extremely nice. Although the Bipolars remain my ‘favorite’ engines, these units do capture the crown of ‘most detailed’ on the layout.
The Genesis Lowey units run smooth and quiet. Only bad thing is that they’re strictly DC while the Bipolars are dual-mode DC or DCC. (fast explanation: in DC all trains go “the same” speed, and DCC is like “multiplayer” where different trains can be doing different speeds, or stopped, all on the same track) Either due to the gearing ratios or simply due to the MTH control setup, the Bipolars run WAY slower than the Genesis units at a given voltage. So the North Coast Limited is screaming around the layout while the Hiawatha leisurely moves through. This fact may push my timetable forward on acquiring a DCC setup, which has always been an inevitability for the future of this layout. For now I just have two separate DC power packs. The switch visible in the image of the roof of #6701A there is a fast-tracks #6 curved turnout, made by hand.
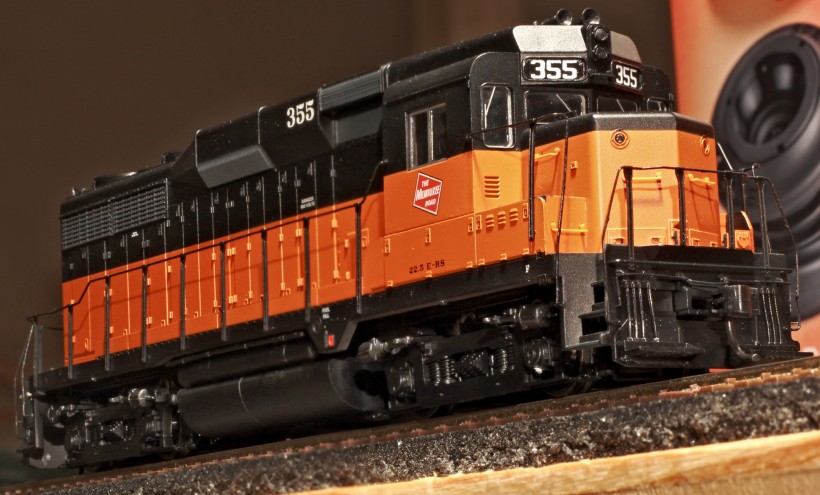
I’ve also been slowly picking up minor pieces of rolling stock when I can find them for cheap. A stock car and a few boxcars. And a Proto 2000 GP-30 for cheap too! That was another lucky find, and he represents the nascent beginnings of a Thunderhawk consist. These are some badass, speedy diesels. I still need at least 2 more GP-30s and a Joe for the motive power… so a loooong way to go still. But this is the “moment of genesis” for the Thunderhawk, which is exciting.

One cool thing about this image (and the bipolar image too) is that they’re actually made of 2 separate photos with a different focus, spliced together in Photoshop. I gotta do more of this composite focus thing, it makes for great shots…


